Sunday, June 20, 2010

Grilled Pineapple and Ginger Soy Chicken Quesadillas

I found and adapted this recipe from my culinary hero, the Pioneer Woman. If you are not familiar with her, I highly suggest you get acquainted. This dinner was so simple and delicious on a summer evening for Mr. Max and me.

Her recipe called for BBQ but I didn't have any BBQ sauce, so I decided to go with the Asian-tropical influence that I had in my fridge instead.

Grocery List:
Package of at least 8 tortillas
No-Stick Spray
2 Cups of Pineapple (whole or pre-cut)
1 package of chicken breast tenders (easier to cut up)
3 Cups of Monterrey Jack Cheese
Cilantro
Honey Ginger Soy Sauce (or teryaki marinade, or BBQ sauce, or whatever you feel like using)

Additional needs:
Large Skillet
Griddle (if you have one)
Chopping Knife
Cutting board
Skewers

First take your griddle or skillet and spray with no-stick spray. Set the heat to low to warm it up.

Next, take your chicken and chop until you have small bite size bits - as mentioned before, I prefer to get the tenders because then some of the work is already done for me. I had a marinade that was from the meat counter at Whole Foods, a honey ginger soy, which I doused the chicken in and let it marinate for a couple hours. I would recommend at least 20 minutes.


Marinading the chicken tenders

While your chicken is marinading, take your pineapple and cut it into smaller bite size pieces, the 1 inch chunks it was already pre-cut into are just a little too big for this. I asked the meat man at the counter if there were any wooden skewers I could buy and he kindly gave me a packet of them for free. I would suggest you do the same, you remember to smile and say please, ladies! Maybe bat those big, beautiful eyes... ok maybe too far, or is it? Arrange your pineapple along the skewers, and set on the griddle/skillet, turning the heat up to medium-high, flipping to each side of your pineapple cube every 3 minutes.


Beginning to cook the pineapple skewers

While your pineapple "grills", take your chicken and cook it through in another skillet. While both are cooking, take a knife to your cilantro and finely chop up about a handful.


Cooking the chicken


Grilled pineapple

Once the chicken and pineapple are done, take a tortilla and set on your heating surface (griddle or skillet). Sprinkle your Monterrey Jack cheese over the tortilla, let melt, then arrange the chicken, pineapple and cilantro on top. Next add a little more of the Honey Ginger Soy sauce. Let it cook until cheese has almost completely melted, then top with more cheese (because everything tastes better with cheese....)and second tortilla. Flip the quesadilla to allow the new tortilla to brown and the inside to cook a little longer.


Tortilla topped with cheese


Topped with pineapple, chicken and cilantro


After adding the additional honey ginger soy sauce


After flipping the tortillas


Once finished, move to a plate, garnish with additional cilantro, sour cream and slices of avocado.


yummmmmy!


Absolutely delicious, please enjoy!

Monday, June 14, 2010

Frijoles Refritos

Refried beans always looked, well, not like something you put in your mouth. I wouldn't touch them. I saw this recipe come across in an email from AllRecipes.com and after looking at what goes into it, I thought to myself ..."self, this doesn't sound too bad." I happened to get the San Antonio Enchilada recipe right before this, so I took it as kismet.

Grocery List:
Olive Oil (original recipe calls for lard or bacon grease if you would rather try that)
1 can of pinto beans
1 onion, diced
2 tablespoon of chili powder
1 teaspoon of cumin
Salt and pepper to taste
Chicken stock, for thinning as the beans cook, amounts vary
1/2 cup of shredded Monterrey Jack or Chihuahua cheese (optional)

Additional Needs:
1 large skillet

Start by adding 3-4 tablespoons of olive oil - or the lard or bacon grease - to a large skillet and add your onions. Saute over medium heat until translucent. Add garlic and cook for 1 minute, stirring frequently.


Add beans, chili powder, cumin and a splash of chicken stock, stir to combine.


Continue cooking over medium heat, stirring constantly, smashing beans with the back of a wooden spoon or spatula as you go. Add a dash of chicken stock when necessary as beans get too stiff. Continue this process for about 10 minutes, or until most of the beans have been pulverized and your desired consistency is achieved. Taste for seasoning, add salt and pepper as desired.


If you are like me and feel like cheese makes everything better, sprinkle the top with either Monterrey Jack or Chihuahua cheese, then you are ready to serve! See San Antonio Enchiladas for finished product. Cook time - 15 minutes.

Sunday, June 13, 2010

San Antonio Style Goat Cheese Enchiladas

This recipe is courtesy of the Food Network, more specifically, Grill Master Bobby Flay. This is easily better than enchiladas that you would find in any local Tex-Mex establishment, tooting the horn of Sir Flay for this creation. Prep time for this meal is about 30 - 45 minutes and works even better when you have an extra set of hands to help, best suited for a weekend date night, girls night or roommate dinner. There are a lot of steps that could take more time if prepared solo. I adapted the original recipe only slightly, having followed it exactly once before but then changed it a bit this second time around.

Grocery List:
- Flour or Corn tortillas (recipe called for corn tortillas, we used flour the first time, corn this second time - I recommend the flour over corn, simply because the flour tortillas are more flexible and don't break apart, as the corn did.)
- 8 ounces of Monterrey Jack cheese, grated
- 3 tablespoons chopped cilantro, garnish
- Sour cream, garnish
- Chopped green onions, garnish
- 1 lb of shredded chicken (we use shredded chicken breast from the deli)

For Red Chili-Tomato Sauce
- 2 Ancho Chilies
- Vegetable Oil
- 1 Large Red Onion, finely chopped
- 3 cloves of garlic, finely chopped
- 1 tablespoon ground cumin
- 1 tablespoon of Mexican oregano
- 1/2 cup dry white wine
- 1 can of peeled and cut plum tomatoes
- 1 cup chicken or vegetable stock
- Salt and pepper to taste

Goat Cheese Filling
- 1 lb of goat cheese
- 3 cloves garlic, finely chopped
- 1/4 cup freshly grated Parmesan
- 1 lime, cut and squeezed for 2 tablespoons of juice
- 1/4 cup finely chopped cilantro

Additional needs:
1 skillet
1 small sauce pan
Blender or Large Food Processor
Small food processor
1 8x12 glass oven-safe baking dish
Medium size mixing bowl
Non-stick spray

*Note: For this recipe, we opted to gather the pre-chopped materials at Central Market to help save on prep time. If you could get peeled garlic (to just throw in the food processor), chopped onion and chopped red onion, that would be beneficial. If you would like to use the dried versions of the spices, it will not ruin the recipe, but for the full-bodied fresh taste, I would get the "plant version" of the oregano, cilantro and green onion.


Go ahead and pre-heat your oven to 375 degrees and spray your baking dish with non-stick spray. Start with making the Red-Chili Tomato Sauce, as it is the most time consuming process.

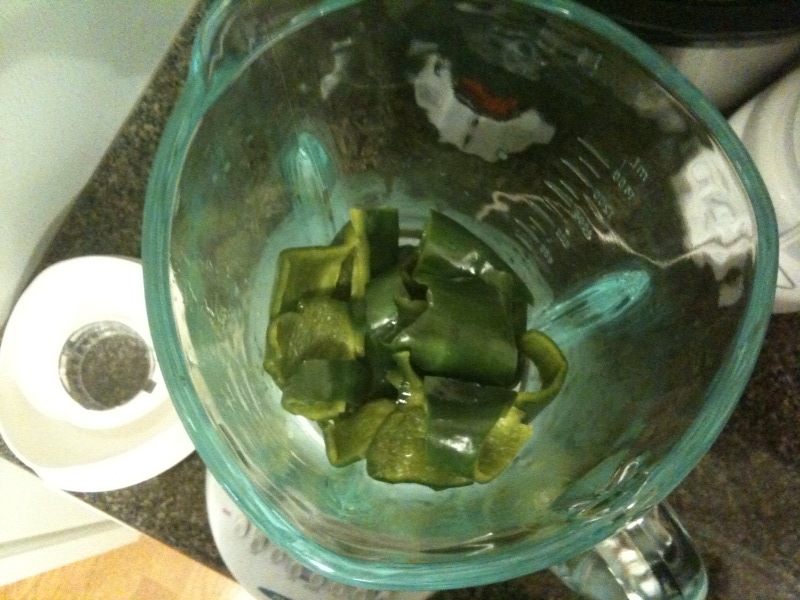
Bring two cups of water to a boil in a small saucepan. Add chilies, remove from heat and let sit for 30 minutes - reserve 1/4 cup of the water. Remove stems and seeds. We used a blender for this next part, since my food processor is a small. Place the chilies in your large chopping device along with the water and puree until smooth. Add the canned tomatoes and blend together.


Boiling the peppers


Cut peppers in the Blender


Blending the peppers with the reserved water


Adding the tomatoes to the pureed peppers


Heat about 2-3 tablespoons of vegetable oil in a medium skillet, over medium-high heat. Add onions and cook until soft. Add garlic and cook for 1 minute. Add cumin and oregano, cook for 1 minute. Transfer this into a medium sauce pan, add chili-tomato puree and cook for 2 to 3 minutes. Next add the wine and stock, cook for 25-20 minutes or until slightly thickened. Season with salt and pepper to taste. Keep this on the stove on low heat.


Sauteing the red onion, garlic and cumin


Transferred into a pot - adding the stock, white wine and chili-tomato puree


Now for the goat cheese filling. If you have a smaller food processor, now would be a great time to use it. However, the first time we made this, I did not have one yet and was able to combine all of these ingredients into a mixing bowl for the same end result. Use your mixing method at this time by adding the goat cheese, 3 cloves of garlic (pre-chopped if mixing by hand, whole if in food processor), the parmesan cheese and fresh squeezed lime juice. Blend it all together until creamy and smooth. Remove from food processor to a mixing bowl, then fold in the cilantro.


All ingredients in food processor to be blended


Blended and beautiful!


Folding in cilantro


At this time, take your red chili sauce and pour about 1 - 1 1/2 cups in the baking dish. Next, dip your tortillas in the sauce to coat them for flavor. Add about two spoons worth to the tortilla, spread and top with the shredded chicken. Roll tightly and place, seem side down, in the baking dish. Repeat process until you run out of room - we were able to fill 8 rolled tortillas. Pour the sauce over your tortillas, then top with the cheese.


1- 1 1/2 cup of sauce spread in the baking dish


Coating the tortilla


Spreading the goat cheese blend in the tortilla


After adding the shredded chicken, rolling tortilla


The rolled tortillas


Covered in sauce and cheese


Place in the oven and bake for 25-30 minutes. Remove from the oven, let cool and then indulge! Add the chopped green onions, cilantro and sour cream to garnish. This dish is great with homemade refried beans or mexican rice.


Hot out of the oven!


Finished product! As noted above, the corn tortillas break apart after cooking, so this turned into more of a casserole of sorts when trying to scoop it out. We served with a refried bean recipe that will be added to the blog as well.

Tuesday, June 8, 2010

Green Beans with Bell Pepper

As I was browsing the prepared food section at Whole Foods, I saw green beans that looked delicious - and at this point in time, I had not particularly cared for green beans. So after a brief chat with the lady behind the counter, I decided to try to create these on my own. This recipe is very simple and only takes about 15 minutes to prepare.

Grocery List:
1 bag of frozen haricot verts (green beans)
1 red bell pepper
1 yellow bell pepper
1 green bell pepper
1 clove of garlic
olive oil

Additional Needs:
Cutting board
Sharp knife
Skillet

Set your bag of green beans on the counter and begin to thaw. Take your tri-colored bell peppers and chop them up into small pieces. The amount I used for 4 servings were about 1/2 of each bell pepper. Next mince up 1 clove of garlic.

Take your skillet and add a dash of olive oil, set on medium-high heat. Cook the garlic until fragrant, then add the green beans, followed by the bell peppers. Add more olive oil if needed to help the green beans cook.


Once the green beans are soft, you are ready to serve. If you would like, add slivered almonds as a garnish over top!

I served these green beans with my aforementioned mashed potatoes and a pineapple-teryaki pork tenderloin.

Monday, June 7, 2010

Mediterranean Chicken Florentine

I found this in America's Test Kitchen's, Light and Healthy 2010 magazine, however, it is a combination of two different recipes that caught my eye. One was Mediterranean Chicken with feta, and sauteed tomatoes, the other was Chicken Florentine with a cream sauce, garlic and spinach - so I combined the two and created my own variation with the elements of each recipe that I liked.

Grocery List:
Non-stick spray (Pam works for me!)
2 Chicken Breasts (or however many you need)
Olive Oil
1 bag of baby spinach (for 2 chicken breasts, add more as needed. I've used fresh spinach and frozen spinach - both work great, tonight I tried the fresh spinach approach)
1 shallot, minced
3 cloves of garlic, minced
1 cup of low-sodium chicken stock
2 tablespoons of heavy whipping cream
1 teaspoon of lemon zest (again, I use the spice jar version, don't zest my own lemon peel)
1 teaspoon of lemon juice
6-8 cherry tomatoes
Balsamic vinegar
Feta cheese (or Parmesan cheese)

Additional Needs:
Oven-safe glass baking dish
Large skillet(s)
Small sauce pan
Cutting board and sharp knife - or food processor

First let's heat the oven to 425 degrees and spray your oven-safe pan.

Chop your garlic cloves and shallot into small, minced bits. Heat two tablespoons of olive oil in a large skillet over medium heat, add 1/2 of the garlic and 1/2 of the shallot at this time, stirring until fragrant. Add the spinach, one handful at a time to the garlic and shallot, stirring frequently until wilted - about 5-7 minutes for each handful. As each amount of spinach has finished cooking, transfer the spinach to a colander, set over a bowl and press down with a spatula to help release any excess liquid. Spinach naturally releases a lot of moisture as it cooks, so to prevent this from being too watery, it is important to drain as much of the moisture at this time.

Grab a new skillet, or clean out the previous one for this next step.

Heat the remaining two teaspoons of oil in the skillet and carefully lay the chicken breasts in the skillet and cook until lightly browned on both sides, flipping them half-way through. Once browned, transfer the chicken to the oven-safe dish, then cover evenly with the spinach you've set aside.

In the sauce pan, add a dash of olive oil, then the remaining garlic and shallot and cook over medium heat until fragrant. Stir in the flour until incorporated, then whisk in the broth and the heavy cream. Next, add the lemon juice and lemon zest, bring sauce to a boil then let cool.

Take the cutting board and chop your cherry tomatoes into halves, then take your skillet, add a dash of olive oil and some balsamic vinegar on medium heat. Put the tomato halves in the skillet and let them saute on the stove, flipping around in the oil and balsamic vinegar for about 10 - 12 minutes.

Use a spoon or ladle to apply the sauce onto the spinach and chicken. The first time to make the recipe, I added all of the sauce but found it was too much - as mentioned before, the spinach adds plenty of moisture as it cooks, combined with all of the cream sauce and the olive oil you've cooked with, it was just a little watery. So now, I apply a few spoonfuls to the top, covering the spinach and setting in the flavor, then let it accumulate just a little in the glass dish surrounding the chicken breasts.

Last, add your balsamic tomatoes on top of the spinach and sprinkle your desired amount of feta, or Parmesan cheese. I thought I had feta in my fridge but came to find that I didn't, so I used Parmesan instead, as the original Florentine recipe called for. If you like the more robust taste of feta, I highly recommend it to make it more of the Mediterranean taste, although Parmesan was a fine addition.

Put the dish in the oven for about 20 minutes - the spinach, tomatoes and cheese may look a bit browned when done. Cut into the chicken to make sure there is no more pink in the middle. Once the chicken is cooked all the way through, you are ready to serve!

Calorie count per serving is 370.

Friday, June 4, 2010

Not Your Typical Chicken Curry

I credit this recipe as the beginning of my real passion for cooking. Once apon a time ago, I was receiving junk emails probably from online shopping or signing up for trip giveaways... anyway... this ArcaMax Recipes from Zola guy sent me a chicken curry recipe. Reading it, I became intrigued because it used onions, bell pepper and sweet potatoes - oh my! So I tried it and it was absolutely amazing. I don't really eat Indian food... tried curry other places, just not a fan, but this one was a winner. So turn that nose back down and give it a try, I think you will be pleasantly surprised. Coming from the girl who wouldn't eat sweet potatoes until she was a sophomore in college because "they just don't look very good".... this is really good.

Grocery List:

2 tablespoons of olive oil
1 pack of chicken breast tenders
Kikkoman Teriyaki Baste and Glaze (just something I like to do...)
2 large sweet potatoes
1 large sweet onion (love sweet vidalia onion!)
1 red bell pepper
2 tablespoons of curry powder (or to taste)
Cayenne pepper is optional, to taste
1 teaspoon of salt
1 14 oz can of unsweetened lite coconut milk

This is Mr. Max's favorite so I made it tonight as good sustenance for his big test tomorrow. Because of this recipe, I decided I needed(wanted) a wok - which a large skillet works out just fine, however, my Maw-Maw gave me a wok for Christmas. So that leads into me telling you - go get a wok, you will enjoy it.

First, take your chicken tenders and cut them into smaller 1 inch chunks. I use chicken tenders because they've already taken some of the chopping work out for me. After chopping I douse the chicken in the Kikkoman's teriyaki glaze and set aside in a bowl.


a little iPhone pic of all my ingredients

Next boil your sweet potatoes in a large pot until softened. While potatoes are boiling, chop your red bell pepper and your onion (only using about 1/2 of the onion).


a little blurry but you can see the amount used

Heat your large frying pan (or wok) with the olive oil. Add the chicken and cook on medium high to brown the edges of the chicken. Don't cook it through at this point - this should take 5-7 minutes.


chicken browning in the wok

Take the chicken out and set it in a clean bowl. Once the sweet potato is cooked, drain and let cool. You will need to skin the potatoes and then chop them into 1 inch squares. Combine the onion, bell pepper and sweet potato into the wok/skillet and let cook until slightly browned on edges.


I have more delicate looking hands than that... Mr. Max was involved with the chopping in this one - very strategic chopping form!


Browning the onion, bell pepper and sweet potato

Return the chicken to the pan and add the curry powder with salt (adding cayenne at this point is optional depending on your spice-o-meter taste buds). Cook one minute to get the curry powder fragrant and sticking to the meat and veggies. The original recipe calls for all of the coconut milk but I find that it is too much, so I start with 1/2 of the can, the most I've used successfully is 3/4 of the can. I recommend you go with 1/2 and add as needed. Stir in the coconut milk and bring to a boil. Simmer until your chicken has no pink in the middle.


After adding the curry powder, salt and cayenne


After adding the 1/2 - 3/4 can of lite coconut milk

I use an Uncle Ben's whole grain brown rice as a base - heat in the microwave bag for 90 seconds and done. Lay the bed of rice and top with your chicken curry and you have a delicious meal, rich with flavor. I know the golden rule is white wine for fish and chicken, red wine for pork and beef, but with the spices of this meal, I highly recommend a spicy Malbec or Tempranillo wine to really compliment this dish. I paired this with a Spanish Tempranillo, label RingMaster.


The finished product with delicious Tempranillo wine

The calorie count for this meal.... only 370!

Wednesday, June 2, 2010

Linguine with Grilled Shrimp and Arugula-Parsley Pesto

As I was walking out of Whole Foods, this recipe card caught my eye. It was very simple and easy to make, I hope you enjoy as much as Mr. Max and I did!

Grocery List:
3 cloves garlic (additional 2 if wanted for shrimp grill mix)
1/4 cup walnuts, toasted
1 cup packed arugula leaves (I bought the bunch of fresh leaves for $1.99)
1 cup packed parsley leaves (I got flat Italian parsley, rather than curly parsley, 1 bunch of fresh leaves, $1.99)
6 tablespoons of extra virgin olive oil, with additional as needed for grilling
2 tablespoons reduced-fat ricotta cheese
2 tablespoons grated Parmesan cheese
Ground black pepper to taste
1 pound dried whole-wheat linguine
1/2 pound of peeled and deveined medium to large sized shrimp
1/2 teaspoon sea salt
1 tablespoon of dried or fresh basil

Additional Needs:
Griddle
Large pot
Medium size saucepan
mixing bowl
food processor - or cutting board with good knife

First let's start by making the pesto. You will put your garlic, walnuts, arugula, parsley and olive oil in the bowl of the food processor, pulsing until smooth. I have a mini-processor so if you have a small one, this may take two rounds of processing to get the required amounts. Next, transfer into a large mixing bowl and stir in the ricotta, the parmesan and black pepper, then set aside.

To cook the linguine, bring a large pot of water to a boil and add the pasta noodles. Cook, stirring occasionally, until soft - or al dente. Drain, but reserve some of the cooking water. Stir 1 tablespoon of the cooking water into the pesto. Add the pasta to your pesto, mix well and cover to keep warm.

As mentioned in the previous pork chop post, I have a love for my griddle - which I actually affectionately refer to as my Griddler. Whatever grilling surface you use, add a bit of olive oil to the surface and set to medium heat. I digressed from the recipe a bit to make the shrimp - creating a simple garlic oil with some dried basil from my spice cabinet.

Use an additional clove of garlic (or two if you are a fan like myself), mince it up, add it to about 1/4 cup of olive oil, then the basil. Dip each shrimp in this sauce to coat. If you have skewers, this could be a fun time to use them! I, however, don't have those so I just laid all the shrimp on my little Griddler and let them cook.

Once the shrimp is grilled to your perfection, toss with the pasta and you are done!


This meal is only 330 calories per serving. I will admit to enjoying a basil-based pesto taste more, but this was a nice little change with a very fresh taste to it.
Related Posts Plugin for WordPress, Blogger...

Print Friendly