Saturday, June 25, 2011

Blueberry BBQ Pork Chops


Tell me friends, does it sound any more "summer" than this? I've had the recipe source for a few months and have held onto this for a nice summer night. My mom got to come over to enjoy this one with me and it was so fun to cook with Mama Ann. It also comes at a great time because many of my friends are participating in Blondes vs. Brunettes, a fundraiser to benefit the Alzheimer's Association, so this is also in honor of them. How does this relate one may ask? Well studies have shown that blueberries can help to improve brain function, so it can be a good preventative food to help combat Alzheimer's disease and dimentia.

This dish has everything going for it - it looks good and tastes great! Looking at it, I didn't think that blueberries and BBQ sauce would compliment each other, but the unique flavor of the sauce provided a little sweetness with a kick of heat.

Nutritional Facts: 352 calories, 15g total fat, 51mg chol, 36g carbs, 21g protein, 26mg calcium per serving (serving size is equivalent to one pork chop with 1/4 cup sauce)

Grocery List:
  • 1/2 cup minced shallots
  • 1 poblano pepper, seeded and minced (or jalapeno but I used poblano instead)
  • 2 tbsp. olive oil
  • 2 cups fresh blueberries
  • 1/4 cup balsamic vinegar
  • 1/4 cup brown sugar (directions said packed, but I left it loose)
  • 1 tbsp. Dijon mustard
  • 1/2 tsp. garlic powder
  • 1/2 tsp. salt
  • 2 tbsp. fresh lemon juice
  • 2-4 bone in pork chops (4-6 oz. each)
This is one that you will want to use some kind of grilling devise for, so I turned on my Egrill and brushed my grates with oil.

Start by sauteing the shallots and the poblano pepper in oil in a saucepan over medium heat until soft - about 2 minutes.

Add blueberries, vinegar, brown sugar, Dijon, garlic powder, and salt; simmer until the sauce thickens - about 3 minutes.

The directions instructed me to puree the mixture but my food processor was in the dishwasher and I didn't feel like make a mess with the blender so I decided not to, but if you are able to, try that out! If you puree, move back into the pan, if you don't, keep it on low heat and either way, now is when you stir in the lemon juice. Because I didn't puree, I used my wooden spatula to help crush the berries. Let simmer for about 2 minutes more, then remove from heat and set aside.

I haven't ever been the biggest fan of the pork chop: it can be a little too tough for my liking but I really enjoyed this. I asked the butcher the difference between the bone in and the filleted and he recommended I go with the bone in for more natural flavor, so I did. Grill the pork chop covered for about 6 minutes per side, until a thermometer reads 155 degrees. While grilling, brush some of the sauce over the chops the final few minutes on each side.

While the pork was grilling, I threw an ear of corn on with the grill (as you can see above) and tossed a simple spinach/arugula salad adding grilled corn and fresh blueberries to serve with the pork. I added 1 tbsp. champagne vinegar, about 1 tbsp of the rest of that fresh lemon used for the BBQ sauce, 1 tbsp. of olive oil, mixed it all up for a simple vinaigrette. Serve it together for a summer time delicious dish!

Monday, June 20, 2011

Make a Meal: Mongolian Flank Steak and Noodle Salad


This recipe comes out of Cuisine Lite's Easy Weeknight Meals and I highly recommend it as a nice switch up. The combination was perfect and plenty filling but altogether very healthy for you. The trick to this recipe is scoring the meat to allow the marinade to penetrate into the meat and soak in all of the flavor. The cook time was about 45 minutes total and collectively as a meal, this consists of 349 calories, 16g total fat, 19g carbs, 34g protein, 51mg calcium per serving.

Grocery List:
For Mongolian Flank Steak
  • 1/4 cup hoisin sauce
  • 1/4 cup low-sodium chicken broth
  • 2 tbsp. rice vinegar
  • 2 tbsp. minced garlic
  • 2 tbsp. sesame oil
  • 1 tbsp. brown sugar
  • 1 tbsp. low-sodium soy sauce
  • 1 tbsp. chopped fresh ginger
  • 1 tsp. Sriracha 
  • 1 tsp. chili paste
  • 1 1/2 lb. flank steak, trimmed
For Noodle Salad
  • 1 package Udon or Yokisoba noodles
  • 1/2 cup slivered red onion
  • 1/2 cup thin strips carrot
  • 1/2 cup thin strips bell pepper
  • 1 tbsp. fresh cilantro leaves
  • 1/2 cup reserved sauce (from above)

Start by heating your grilling surface and make sure to brush the grill grate with oil. Combine the hoison, broth, vinegar, garlic, sesame oil, brown sugar, ginger, soy sauce and Sriracha in a food processor and blend until smooth.

Score one side of your flank steak in a diamond pattern and place in a resealable plastic bag. Pour all but 1/2 cup into bag and marinate at room temperature for about 20 minutes. Make sure you move the steak around to allow both sides to coat with marinade.

While your steak is bathing, boil your noodles in a large pot - these noodles cook fast. Drain and let cool, running cool water over them to assist.

After 20 minutes of marinating, take your meat and throw it on the grill to cook for 5 minutes, then flip the meat and grill until desired preference - about 3 minutes more was medium-rare.

Meanwhile, take your thin strips of bell pepper - as you can see below...

and your thin strips of carrot....(I grated it with a knife like Juliette Lewis in Christmas Vacation when she asks her mom if it would be indecent for the grandparents to stay at a hotel because when Alexander called, Grandpa told him she was using the bathroom and that's humiliating)

and your thin slices of red onion (done with a mandoline)....

Combine them all together in a bowl with the noodles and cilantro, adding in the reserved Mongolian marinade and tossing together.

Add some chopped scallions for garnish if you would like!

Finally, transfer the beef to a cutting board and using a serrated knife, slice at an angle against the grain into thin long strips of steak.

Put it together and you have a delicious and nutritious meal! Top the beef with additional leftover sauce, as shown in the intro, if it strikes your fancy.

True Texas Traditions: Chevrolets and BBQ

 picture from inside of Sonny Bryan's

On June 11, Max Man and I got to partake in a little activity out of our realm of regular and venture on a scavenger hunt, hosted by Chevy and their Driving Heartland initiative, along with 4 delectable barbecue restaurants around the Dallas area (click the linked words to view our YouTube video - we are interviewed and you can hear Max using the OnStar!) Chevy lent various models out for a group of people to use for the weekend, genius promotion if you ask me. The car I received, no, I'm sorry, the tank I received caught me off guard at first. Let me be honest with you: I am not the best driver out there, I can admit that. When that big black Suburban pulled up in my parking garage on a Friday afternoon I had two thoughts: secret service and 15 year old self. Secret service is a "duh" factor, the black tinted windows and shiny black tanker made me feel like I would be carting around George W. on his personal around town errands. Then I went to the nostalgic thoughts of when I was 15, with a permit and mom's suburban learning to drive in the local high school's parking lot thinking how will I ever be comfortable going over 17 mph.

Though I am far from Suburban years, as in needing one for myself, I did enjoy my temporary ride for the weekend aside for some of the maneuvering methods such as merging, parking, backing out... that was a little more challenging than my liking. When I am in prime-time soccer mom years, I'll think back and remember my Chevy Suburban!

We started the day at the original Sonny Bryan's BBQ, which was conveniently close to my apartment and work. It was a tiny little shack that reveled in tradition and brought a taste of small country life to the big city. The restaurant was comprised of a small room with the counter and condiments, then an equally small room of old school desks with plaques above them for valued customers and family  this was where you ate. The only tables resided outside under big yellow umbrellas but with that triple-digit heat, we opted for the school desks. At this location we sampled some of the best brisket I've ever had, ribs, sausage and one of their specialty sides, onion rings. They were HUGE. What was also really impressive is that they've had the same smoker on-site since it opened in 1958 - it was very well seasoned, that's for sure, and you could definitely taste it in their meat.
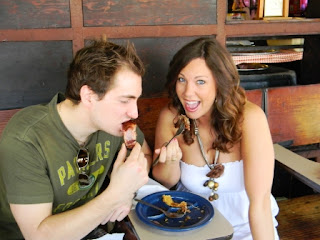
Mr. Max and I enjoying our first plate of BBQ - I'm glad we went the sharing route....
I personally adore the Corona BBQ Sauce bottles.

After receiving our first clue envelope, we hurried to the Suburban - let's call it the 'Burb - and drove it like my old Jetta to the next location. Both of us felt this was a race to get there before everyone else. Sidenote: it wasn't. We got to Sammy's BBQ and had more amazing food. While I felt their meat lacked a little in comparison to Sonny's, their sides were amazing. The owner's wife came over and told us a little about their start, how her husband only wanted to serve meat but she insisted on creating sides from her own book of family recipes. This is a perfect instance of how the man may be the head in the relationship, but the wife is the neck and turns the head in the right direction. I heard that somewhere... 

Here I focused on a delicious spinach salad, a twice-baked potato dish and Texas Toast.
With our friends Wes and Lindsey at Sammy's - I'm proud of Lindsey and myself for not staining our white attire when we were sampling BBQ all day
This next stop in the 'Burb was perhaps my favorite as we ventured from Uptown to Bishop Arts District to Lockhart's Smokehouse. Everything about this place impressed me, including the fact that you ate on butcher paper, no plates! It is a family inside joke that I once told my mom that having china was stupid and when I grew up, I would register for decorated paper plates (this was after watching all the women in our house polish silver and clean the china for hours after a Christmas dinner). Lockhart's provided a different array of food which I appreciated, there was a wonderful originality to such a common genre. My favorite meat was their smoked turkey breast, it was just to die for! We also sampled tasty sides such as macaroni and cheese, jalapeno baked beans, sauerkraut-slaw, potato salad, deviled eggs and their own creation - rib rub. The rib rub was a combination of rib meat, jalapenos, brown sugar, cocoa and that's all I can remember. It was great by itself or on a cracker! This was definitely a place I look forward to coming back to.
Our last and final stop was an "upscale" BBQ joint called Smoke, located at the boutique Hotel Belmont in South Dallas. I have been to the patio bar at the Belmont before but had not tried Smoke yet. I loved this restaurant for several reasons but one of the main things is that they used their own homegrown ingredients from a garden behind the restaurant and local produce. They also brought unique twists to their menu including their drink and dessert selections. I managed to try their incredible hominy casserole and a bite of brisket even though I had O.D.'d on meat for the day, I had to compare. The stellar features were a vanilla infused rum made in-house using wooden plank boards soaked in natural vanilla extract and large honey tubs to soak the rum and planks in. Add a splash of coke and a little maraschino cherry drenched in fruit juice - mmmm! Then, there were the desserts... We got to try Max Man's favorite dessert, keylime pie dressed up with a fabulous meringue topping, and my BBQ dessert favorite, banana pudding but this was complimented by chocolate sauce and peanut butter crunch bites. There was also a chocolate cake with a caramelized banana topping. The perfect end to a fun day, thanks Chevy!

Wednesday, June 15, 2011

Skinny Chicken Parm


The first weekend of June has come and gone. For the majority of you, I doubt this holds much significance at all. If you are like us though, it means one thing: the CFA test I, II or III. I am going to take just a minute and be a relationship-sappy-goober to say that Max Man is the most hard working and determined individual I know for all that he puts into this test. To watch him prepare for it all through the spring months, beginning in February and right up until that first weekend in June, it is some serious dedication! I, on the other hand, was a crammer all through school, the art of "studying" was not my thing. I would skip class to go to my internships, let me work and do all the hands-on learning. So I'm kinda in awe by this person because it is just something I could never do. To see such dedication and follow-through, it's a good quality in a man ;-)

Ok, I'll stop now.

Anywho, each year for this test, I want to make sure that Mr. Max has a meal of sustenance the night before. In the past, it has been his favorite, chicken curry, but this year he asked if I had a recipe for chicken parmesan, one of his rotating Italian restaurant favorites. 

Side story: there was this time he had the idea to make it for dinner one night. I asked if I needed to pick anything up on my way over, he said no, he had everything. I got there. The version of chicken parm was chicken covered in pepper jack cheese, baked. I teasingly brought this up, he didn't really understand why it was funny. "It was cheese baked on chicken," - I give up.

Here's my problem with chicken Parmesan: it can be really fatty, high in carbs and calories. I recently found a "skinny" version in one of my Gina's blog. From SkinnyTaste,  this recipe includes 224.5 calories, 8.6g fat, 25.1g protein, 14.2g carbs and 1.3g fiber per serving.

Grocery List:
  • 2 chicken cutlets
  • 3/4 cup whole wheat breadcrumbs
  • Oregano, basil, garlic powder, to taste
  • 1/4 cup grated parmesan
  • 2 tbsp. olive oil
  • 3/4 cup reduced fat mozzarella
  • 1 cup marinara
I cooked over at Max Man's place and had a very challenging time due to the lack of appliances available so I gave up on the pictures. Start by preheating the oven to 450 degrees and spray a baking dish with cooking spray. Using a pastry brush, or in my circumstance this time around, a spoon, coat each side of the chicken with olive oil.

In a bowl, combine the breadcrumbs with the grated parmesan. Add sprinkles or pinches, what your tastes prefer, of dried oregano, basil and garlic salt. Dip the coated chicken in the breadcrumb mixture and place in the baking dish. Bake for 15 minutes in the oven. Flip the chicken over and bake for another 5 minutes. Remove from the oven and top with the marinara sauce, followed by the shredded mozzarella. Bake an additional 5 minutes until the cheese is melted and slightly browned.

Served with a simple spaghetti and garlic roasted broccoli!

For an even lower carb recipe, you could skip the breadcrumbs altogether and pan-sear your chicken on the stove. Sprinkle it with oregano, basil and garlic salt then finish cooking in the oven, waiting until the last 5 minutes to top with marinara and cheese. 

Friday, June 3, 2011

Throwback Thursday: Black Bean Casserole in Enchilada form


As you may recall, my Throwback Thursdays are a new addition to 2011 blogging where I attempt to dedicate my Thursday night meals to a previous recipe post. It was a way to resurface old recipes but what I found was that it has become more of a way to reinvent them.

Initially, I had a meeting scheduled for this evening so I had not intended to cook dinner. Meeting fell through, so I needed a meal plan. I first looked at Gina's blog and found a Zucchini Enchilada recipe - it looked intriguing, so thought I'd try it out. Reading it though, I thought about the Black Bean Tortilla Casserole I made from Cara's Cravings blog and how much we loved that. From there, this recipe was born. I decided to take parts of that dish and make it into an enchilada version.

This is a fun one, but tailored more for the adventurous eaters. However, my advice to you - if you know you are feeding picky-ish palates, just don't tell them what you are serving. That's how my friend Julie got me to love the inspiration for this dish in the first place - she made the casserole for us and just served it, no questions asked until after a few bites. It was awesome and I had to know how she made it. Simply seeing it in a magazine somewhere, I don't think I would have gravitated to it on my own.You don't like bell pepper? No prob, can't tell it's in there. Hate onions? You would not know one bit. You kinda have to like squash, that one is a prominent bite.

Here's my reinvented dish for this Thursday's throwback edition, black bean zucchini enchiladas.

Grocery List:
  • 1 onion, diced
  • 1 bell pepper, diced (I chose yellow this time because it is summery and sweet!)
  • 1 zucchini squash, chopped (I tried to make small bitesize bits that would fit well in an enchilada bite)
  • 3 cloves garlic, minced
  • Cumin
  • Chili powder 
  • Salt and pepper to taste
  • 1 can black beans, drained and rinsed (I used 3/4 can for the enchiladas and the 1/4 of the can for my salad)
  • 1 can diced tomatoes and chipotle peppers (tomatoes with green chilies work too - I only used 1/2 can for this and saved the other 1/2 for the enchilada sauce creation)
  • 2 oz. cream cheese
  • Whole wheat tortillas
  • 1 cup tomato sauce (I used Hunts from a can)
  • 1/4 cup cilantro, chopped
  • 1 tsp. adobo sauce (to turn up the heat just a bit)
  • Low fat Mexican Cheese blend
Start by heating your oven to 400 degrees and a skillet on medium-high. Add the onions to begin sauteing, followed by the yellow bell pepper. Cook for about 5 minutes until veggies are softened.

Add the zucchini and garlic. Cover and let cook to soften the zucchini, but frequently stir to prevent garlic and onion from burning.

Start shaking it to your hearts content - the cumin and chili powder that is. Grind a little salt and pepper for good measure. Stir it all together to coat the veggies the best you can to really pack in the punch of flavor.

Now add 1/2 the can of tomatoes/peppers and 3/4 can of the black beans. Nom, nom, nom.

I cut up 3 cubes of low fat cream cheese, let the heat melt it and mix it together to form a creamy consistency. I then added two more small slices because I wanted too.
Creamy....perfect enchilada filling

As I waited for the cream cheese to soften and stir in, I went ahead and started my red enchilada sauce. In a medium sauce pan, add the other 1/2 can of the diced tomatoes/peppers with 1 cup tomato sauce. Let simmer on medium heat. Next add 1 tsp. of adobo sauce (from a chili peppers in adobo can), 1/4 cup cilantro and another small chunk of cream cheese to assist with the creamy texture. (If you are measuring your chunks right, you will have now used 2 oz. of cream cheese, roughly 1/4 of the bar)


Line your casserole dish with the sauce - if you feel that you need more sauce for the size of your dish, add the additional tomato sauce to the pot, mix with the rest and you're set.

Grabbing a wheat tortilla, add about 3-4 spoonfuls, roll and place seam-side down in your baking dish.


Top the enchiladas with the remainder of your sauce...

And smother it in a mexi-blend cheese with some fresh cilantro. Pop it in the oven for about 10-12 minutes.

As the enchiladas were becoming perfect in the oven, I whipped up a simple Mexi-Texi Salad using romaine lettuce, diced bits of a Roma tomato (my preference), the remainder of my black beans, sweet yellow corn, diced chunks from 1 avocado and tossed it all together in a fat-free smoky chipotle ranch. Yum.

When the timer dings, check your 'ladas. I tried to make that word work. I don't think it did... yet I don't delete. Remove from the oven and inhale, yummm and exhale sigh out.

Dish it out and serve it up. Your taste buds will be singing, it is just packed with flavor, your tummy will be full and happy. Happy dining, friends!

Strawberry Spinach Salad


I wanted a good ol' strawberry spinach salad this week to accompany the garlic-soy flank steak dinner and get a good dose of greens in a tasty way. Salads seem easy enough to put together but every now and then it's nice to have a check list. I used the little working knowledge I had of salad dressing and wanted to share a nice summer salad with you! Just to warn you, I did not really measure anything out, it was very much "some of this, some of that" so I am going to do the best I can on guestimations, but you may want to follow loosely and do it to your tastes!

Grocery List:
  • 2 cups spinach
  • 1 cup strawberries, halved
  • Goat cheese
  • 1/3 cup toasted almond slivers
  • 3 shakes allspice
  • 3-4 tbsp. Olive oil, divided
  • 1 tbsp. apple cider vinegar
  • 3 shakes of champagne vinegar
  • 2 shakes of Worcestershire sauce
  • 1-2 tbsp. honey 
The first thing I did was  grab some slivered almonds that I had on hand and decided to toast them. I added a little olive oil to a skillet, threw in the almonds then had the thought to sprinkle some allspice over it for added taste. Cook them on low-medium heat for about 2 minutes, then try to move them around, flipping them over as you can and cook a little longer. You'll want to pay attention to them so they don't burn.
this is a good finished product

I bought some strawberry halves from Whole Foods and just halved about 1/2 cup of them to make for easier bite size bits (that's a lot of halves in that sentence). In a bowl, combine your spinach, strawberries and sprinkle your preferred amount of goat cheese.

In a smaller mixing bowl, combine the salad dressing ingredients: 2-3 tbsp. olive oil (start with 2 and see how that goes for you, no one likes the EVOO to be the main taste in dressing), apple cider vinegar, honey, champagne vinegar and Worcestershire sauce.

Add the dressing, as much or as little as you want, followed by the toasted almond slivers and toss. I personally like the way the goat cheese smears all over the leaves and strawberries, but if you don't, then do the goat cheese crumbles on each individual serving. Ta-da! Simple strawberry and field greens salad with your own toasted slivered almonds and light salad dressing.

    Related Posts Plugin for WordPress, Blogger...

    Print Friendly