Showing posts with label Breakfast. Show all posts

Thursday, July 19, 2012

Apple Banana Muffins


I am posting about a baked good. This one earned me a real-world girl scout patch because not only was I able to accomplish the task successfully, I also pushed the limit and added ingredients that were not on the trusted recipe card. When I do that in the baking world I fail miserably but not this time people!

So there I was in Whole Foods gathering my food needs for the week.... as I passed by the bananas I saw a stack of recipe cards sitting there staring at me, calling out "take me, read me, make me." I looked at it, almost dismissed it because it was a baked good but I held onto it. I walked around finishing my shopping and still had it in my hand, just studying it; the recipe was for Banana Apricot Muffins.. However, there were a few ingredients that I wanted to remove. I didn't really want to use dried apricots and I'm not the biggest fan of walnuts in muffins. I have seen and read about using apple sauce in baking in place of butter, sugar or oils and decided that sounded even better, banana and apple muffins. My curiosity and sudden need to bake this won in the end, I grabbed some applesauce and almond flour, the only two things on the card that I didn't already have at home, and I was on my merry way.

I get home and I am still in the mood to bake. Sometimes I have these urges and then in the car ride home I snap out of it, but on this car ride home I decided that I wanted to make them into mini-muffins b/c I never can eat a whole muffin. Great thought, but ill-prepared. You see, I don't own a mini-muffin pan. It's on the wedding registry but that won't help me right now. Instead of going right up the street to get a cheap disposable version at Tom Thumb, I went to Target and I bought a real one. So now, I am invested in this process.

I start to bake, channeling my inner "Mr. Max" mindset of measuring everything perfectly, pre-reading instructions to make sure I follow correctly and all that left-brained stuff, while still not really following the recipe at all with my additions. A little oxy-moronic. As I grab for the apple sauce, I realized that I bought a cinnamon apple sauce and have a mini-dramatic meltdown to myself. OMG, of course, here's the downfall, hrmph. Then princess in my head gets slapped by reasoning and I come to the conclusion that I'm very content with this oopsie. We love Bananas Paradise and that combines cinnamon and banana. We love the Apple Crisp and that combines apple and cinnamon. So all I'm doing is marrying the two combinations to make us a love muffin.

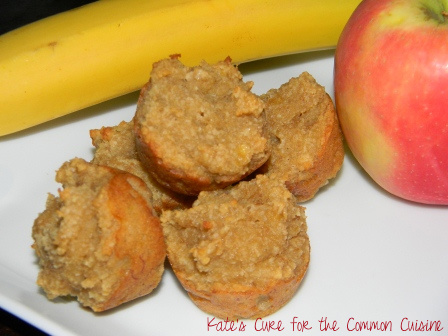
I paced the floor as they baked. Ten minutes in, I could smell them and that passed the first test of "is this going to turn out well?" Then at fifteen minutes in, the smell permeated a richer aroma and they were rising correctly, passing test two. I removed them from the oven when the timer went off, toothpick tested and felt they needed 5 minutes more after toothpick tests. After that timer went off, I was confident. Just as I was thinking, this is too good to be true, I popped one into my mouth and burned the heck out of it. My personal baking flaw #27 - I can't let something cool long enough, too greedy for the first taste. Thankfully, this was the only flaw and we had some tasty muffin bites to enjoy!

Nutritional facts for this one can be found here; one bite sized muffin is 3 WW points. This took 35 minutes from start to finish and to avoid damaging the roof of your mouth, an additional 5-8 minutes outside of the tin to cool.

Grocery List:
  • 2 ripe bananas, mashed
  • 1 cup unsweetened cinnamon apple sauce
  • 3 tbsp. agave nectar
  • 2 eggs, beaten
  • 3 cups almond flour
  • 1 tsp. baking soda
  • 1/2 tsp. salt
Pre-heat the oven to 325 degrees and grease the muffin pan. If you prefer to use paper cup liners, place those in the tin. In a large bowl, combine the bananas, apple sauce, agave nectar and eggs. Stir in the baking soda and salt, followed by the almond honey until just combined.
 

Using a large spoon, fill each mini-muffin cup until just above the pan line.
 

Bake for 20-25 minutes and poke with a toothpick to make sure they are done. Let cool and enjoy!


Tastefully yours,


Monday, March 5, 2012

Smooth(ie) Operator: The Elphaba


The smoothie. It's kinda like the crock pot meal where you put a bunch of stuff in a contraption and press a button to take care of the rest.

I happened to have a conversation recently with a friend who made me think about these drinks. She said that she goes to Jamba Juice all the time because she doesn't know how to make them herself and have them taste as good (that's important!), needing inspiration to make her want to blend her own. I can completely relate to that and was the same way until I bought a blender because I felt I needed one, but then never used it because I didn't know what I wanted to make with it. It's like that fabulous pair of red shoes you bought for that one dress. They just sit there, you want to be able to use them, so you find whatever you can (appropriately) pair them with to get more use out of them. Then, before you know it, you have found all kinds of outfits to wear with and love them to pieces! So there, blenders are just like shoes.

I had always been a berry-smoothie person, but in the last few months, I've encountered a switch. I have now replaced the berries with banana, my usual kale with spinach, and the juice with almond milk. The conversation with said friend above made me decide to post, just in case someone else out there is searching for a quick smoothie that appeals to you. This type of recipe goes by many names: Green Monster, Green Machine, Green Goddess, ... I think you get the picture! I'm going to call this the Elphaba, if you understand that reference, we can be best friends.

Now a personal disclaimer, intended for those with aversions to drinking green stuff: I used to have an issue with the green color, which is why I would use the Kale and mixed-berries combo, it gave me the nutrients but kept it looking purple and berry-licious. However, I was growing kinda tired of berries, getting the seeds in my teeth, and needed to switch up my taste to keep my palate interested. After a sampling at Whole Foods, I really liked a PB/Banana/Vanilla combo, but those are all light colors, does not disguise the green. The spinach does have a more mild taste than the kale, so that part was actually better. I remembered I used to drink Green Tea Frappucinos all the time, obviously, those are green. So I Jedi-mind-tricked myself and now don't think twice regarding the color, enjoying every last drop.

Click here for my nutritional facts calculated at SparkRecipes.com. Makes enough for one 24 oz. or two 12 oz. smoothies, facts are for one 12 oz. serving.

Grocery List:
  • 1 cup frozen bananas, pre-chopped
  • 2 cups baby spinach leaves
  • 1 cup vanilla almond milk (unsweetened)
  • 1/2 cup Greek vanilla yogurt
  • 1 tbsp. peanut butter
Pile your contents in the blender. I go: fruit, liquid, greens, yogurt, peanut butter. I've also used Nutella instead of peanut butter, but you get much more dimension with 1 tbsp. PB, than with 1 tbsp. Nutella.

    Make sure is all locked in place and hit the liquify/blend/puree button... whatever strikes your fancy. Depending on the state of your blender, you may need to jiggle it a few times, stop it to push the contents down, things of this nature... blend until you reach a perfectly smooth consistency.

    Pour into a cup and you have a perfect breakfast, lunch, or post-workout snack!

    Tastefully yours,


      Monday, November 21, 2011

      Nutella and Fruit Filled Crepes


      Whenever I hear "crepes" I always think of this scene between Sacha Baron Cohen and Will Ferrell from Talladega Nights:


      My sweet friend Erin and I had the opportunity to get together on Sunday afternoon. We decided to forgo the typical Sunday brunch out and have our own homemade brunch on my porch instead. When discussing food, Erin says "well, I've always wanted to learn how to make crepes" - something I have not done but responded "I have a crepe pan I have yet to use!" So there we were, two girls in the kitchen, with an internet recipe compilation and a crepe pan. The crepe pan was an impulse purchase nearly a year ago at World Market. There was a sale, I thought to myself: "self, you should make crepes sometime," and I bought the thing for $6. At this moment in time, I'm so glad I did. Though a flat skillet surface would also suffice.

      I searched the lovely world wide web for a while, trying to grasp the concept of crepe making, comparing different variations. Luckily, they were all very similar - so that made this easy. For the filling part, we decided to go the fruit route with strawberries, bananas and Nutella.

      As Erin made mimosas, any semblance of organization for methodical food-making went out the window between the heaven in a glass and 4 months of conversation that we were catching up on. Can't say that is the best way to go about making such a delicate food but it all worked out well in the end! The pictures below don't necessarily depict the perfect process, there were several attempts but they all tasted wonderful and that is what was important. The first crepe was a learning experience - it was thicker than it was supposed to be and it cooked all the way before we remembered to add the filling and then the folding, making it difficult to acheive a beautiful folded end result. The second one was better, but still didn't have the fold part down.

      After eating, hours of conversation and mimosas, Erin left and I realized there was more batter for a third attempt. This time, I used less and spread it around the pan, so it was thinner - the way it is intended. I was more concentrated (despite the mimosas, or maybe because of them, hmm) and got the flip, fill and fold part in time for it to turn out prettier than the first two attempts. In this case, third time's the charm is rather accurate.

      Grocery List:
      For the Crepes
      • 1 cup flour
      • 2 eggs
      • 1 tbsp. sugar
      • 3/4 cups milk 
      • 1 tsp. vanilla
      • 2 tbsp. butter, melted
      For the Filling
      • 1 cup sliced bananas
      • 1 cup slice strawberries
      • 1 tbsp. Nutella per crepe
      • Powdered sugar 

      Combine the eggs and flour in a bowl, mix well to help prevent lumps. Stir in vanilla, sugar, milk and butter until well combined.

      Grease a skillet or crepe pan and set the stove on low-medium heat (3-4 on the dial). I've decided that 1/4 cup is the proper amount - after 3 tries - to add to the 9" circumference skillet surface. It is not going to spread very far on its own so taking off the heat, use your wrist to guide the batter around the pan surface until it is pretty evenly spread.

      Let sit for about 1 minute. Like making a pancake, use a spatula to gently nudge under the sides to see how solidified it has become. If it tears a little - which it may, it's pretty thin - use the extra batter as adhesive to mend the tear. My solution at least! When you can get under the crepe with a spatula, work to flip it gently yet swiftly. The first time we tried this, Erin helped me guide it and quickly flip it over with an additional spatula, a paper plate was involved.... by the third attempt, I had it down. Once flipped, let it sit on the heat for about 30 seconds, then add the Nutella so it becomes nice and creamy across the crepe surface. Gently spread it then add the fruit topping.

      Finally, using the spatula, generously fold one side over the other to close and create the look of a crepe.

      Move to a plate and sprinkle with powdered sugar. Take a bite, relish the rich flavors of the choco-hazelnut, fruit blend and a hint of vanilla from the thin crust surrounding it all. Not too shabby for a first attempt! I hope to become more adventurous and try my favorite restaurant crepe, stuffed with avocado, cheese, tomato, spinach, and topped in a poblano cream sauce. One can dream... but for now, indulge in this!

       Attempt 1: Little thick, didn't quite get the fold right...but really delicious

      Attempt 2: Better but there's a giant lob of Nutella to "hold" the fold, topped with powdered sugar.
      Attempt 3: Thin, stuffed, folded, delicious!

      Tastefully yours,

      Tuesday, September 6, 2011

      Banana Spice Muffins


      We've talked about this before - when I say we've "talked", I mean that I have posted and you have read it, ergo, we've had a conversation - I am not a breakfast person. When I was little, my mom had to trick me the best she could eventually winning me over with Carnation Instant Breakfast shakes as I ran out the door to school. It could either be my inability to wake up more than 45 minutes before having to be somewhere, or the fact that I just do not have one iota of hunger in me until about 10 am at the earliest. This is something that I've been trying to change.

      To assist in that effort, I've been looking for breakfast recipes to try out on weekends when there is ample time in the morning to make something, consume and go about my day, then save the oatmeal and cereal for breakfast when I get into the office.

      I came across this muffin recipe in Cuisine Lite Fresh, Flavorful and Healthy magazine. We made them one Saturday morning for a fantastic result! They made 15 total allowing for left overs. Each muffin contains 206 calories, 7g fat, 46mg chol, 32g carb, 5g protein and 54mg calcium.

      Grocery List:
      For streusel topping
      • 1/4 cup chopped walnuts (I simply threw walnuts into my mini-food processor)
      • 2 tbsp. all-purpose flour
      • 2 tbsp. brown sugar
      • 1 tbsp. unsalted butter, melted
      • 1/2 tsp. ground cinnamon
      For muffin mix
        • 2 cups all-purpose flour
        • 1/2 cup granulated sugar
        • 2 tsp. gound cinnamon
        • 1 tsp. baking powder
        • 1/2 tsp. baking soda
        • 1/2 tsp. ground cardamom
        • 1/4 tsp. nutmeg
        • 1/4 tsp. kosher salt
        • 1 cup low-fat vanilla yogurt
        • 1/2 cup mashed banana
        • 2 egg yolks (reserve whites)
        • 3 tbsp. unsalted butter, melted
        • 2 egg whites
        Start by preheating your oven to 400 degrees. Line muffin tins with paper liners and coat with non-stick spray. We are going to start by making the streusel topping combining the walnuts, 2 tbsp. flour, the brown sugar, 1 tbsp. melted butter and 1/2 tsp. cinnamon. Stir together well and set aside.


        In a large mixing bowl, combine 2 cups flour, sugar, 2 tsp. cinnamon, baking powder, baking soda, cardamom, nutmeg and salt.

        You will need both egg whites and egg yolks for this recipe, both at different times of the process. The way we separate eggs around here is literally, hands-on. Here's Max Man using his fingers to drain the egg whites while catching the yolk. Gently run the egg contents back and forth between fingers/hands to get the egg white out and end up with just the yolk.

        In a smaller bowl, whisk together the yogurt, smashed banana, egg yolks and 3 tbsp. melted butter. Stir this into the dry ingredients.


        Finally, in another separate bowl, whip together the egg whites until they "peak". One thing I've learned is that you want your egg whites at room temperature for the best result. So for this recipe (and any other time you use egg whites), set your eggs out a little before you begin your process so they are closer to room-temp, rather than just out of the fridge. I'm pretty sure we still didn't get this part 100% correct, but we whipped as we could until they looked like foam - the best way to do this is with electric beaters. You will want to gently fold the egg whites into the batter. And I apologize, we did not capture this by accident - probably the most helpful picture for you.....but here is the outcome of the muffin mix.


        When your egg whites are well combined, your muffin mix is ready to dole out into the muffin cups, filling about 2/3 of the cup with batter. Gently add a dollop of streusel to the top of the muffin - I used my fingers and fork to gently spread across the top of each muffin. You don't need too much, the spreading goes a long way.

        Bake the muffins for 15-20 minutes and to help your certainty, advance the toothpick test - if clean, you can remove from the oven!

        Let cool for about 5 minutes and indulge.
        Served with scrambled eggs and fruit

          Wednesday, July 6, 2011

          Carrot "Cake" Flapjacks


          My love affair with carrot cake bloomed late in life but better late than never. As previously mentioned, I had very finicky tastes for a long time, I heard carrot cake and I immediately thought: gross. That was until my friend Lindsey made a carrot cake about four years ago and I realized what I had been missing. This was during a time period that we celebrated any little thing for an excuse for her to bake and us to indulge such as "I broke up with a boyfriend" cupcakes, "I love fun-employment before I start new job" cake, "staph infection on the toe keeping me from work" brownies, "I bought a new fabulous purse" cookies... it was glorious. Ever since then, her carrot cake was my favorite.

          Now I've also mentioned in past posts that I am not a baker. I am very right-brain driven and do not possess the patience and math/science internal wiring to do everything precisely, I'm much more approximate and enjoy putting my own spin on things. This bodes well for cooking where there is more room for whimsical innovation but no, not baking. However, I came across this recipe in Cooking Light's Quick and Easy Low-Cal Recipes and decided this is something I thought I could make without messing up. I even added a little more brown sugar and cloves, a tiny more vanilla, just because I wanted to. These provide a tasty alternative to the common pancake, featuring warm spices and bright carrot flavor! Before heading out of town for the Fourth of July weekend, I made these for Mr. Max and myself as we began our 4-day vacation.

          Nutritional facts per serving (serving size = 2 flapjacks) include: 244 calories, 7.6g fat, 7.7g protein, 35g carb, 2.2g fiber, 2.3g iron, 175mg calcium.

          Grocery List:
          • 1 1/4 cup flour
          • 2 tsp. baking powder
          • 1 tsp. ground cinnamon
          • 1/4 tsp. salt
          • 1/8 tsp. ground nutmeg
          • Dash ground cloves
          • Dash ground ginger
          • 1/4 cup brown sugar
          • 3/4 cup low-fat buttermilk
          • 1 tbsp. canola oil
          • 1 1/2 tsp. vanilla extract
          • 2 large eggs, lightly beaten
          • 2 cups finely grated carrot
          Start by lightly spooning flour into a dry measuring cup and level with a knife. Combine the flour with the next 7 ingredients in a large bowl, stirring with a whisk.

          Stir in the brown sugar, buttermilk, canola oil and vanilla extract, stirring until moist. Shred about 2 cups worth of carrot into the mixture and stir it in.


          Heat a large nonstick skillet or griddle over medium heat and spray with cooking spray.

          Pour about 1/4 cup batter onto the hot skillet and spread evenly to form a circle disk. Cook for about 2 minutes and lightly light with a spatula to flip or until tops are covered with bubbles and edges look cooked - if you have trouble, let it cook a little longer until more firm.

          After carefully turning the pancakes over, cook another minute or until the bottoms are lightly browned. Repeat procedure with remaining batter.
           

          Keep the finished hotcakes warm in the oven while you prepare the rest.

          When your pancakes are finished, add butter and maple syrup if you choose and enjoy, we certainly did!
          Served with scrambled eggs and bacon

          Tuesday, April 19, 2011

          Goat Cheese Omelet


          Due to a storm this evening with hail and heavy winds, my mani/pedi date with friend Sarah (check out her blog!) was pushed back a little later in the evening to let the tornado threats pass. Welcome to spring in Texas! However, weather has been really erratic all over the south and even Midwest - thoughts and prayers go out to those it has effected whether slightly or devastatingly.

          Not getting home until after 8:00 gave me a switch up - the pork hadn't fully defrosted and it was time to eat. With Mr. Max on his way over, I switched gears into breakfast for dinner intended for Wednesday night instead (another benefit to meal planning and shopping for the week ahead of time!)

          I love cheese and eggs, so many combinations! I made some quick sauteed "stoplight" veggies on the side but doing it over again, would have thrown them in the omelet, they were a fabulous complement. 

          This little meal, including the veggies, contains 233 calories, 17g fat, 16g carbs, 1g fiber, 2.5 mg iron and 84mg calcium per serving.

          Grocery List:
          • 4 large eggs
          • 1 tbsp. water
          • Salt and pepper to taste
          • Tony's Creole (my addition)
          • 1/4 cup crumbled goat cheese
          • 1 tsp. parsley
          • 1/2 tsp. tarragon 
          • 1 tsp. olive oil
          • 1/2 cup chopped zucchini
          • 1/2 cup julienned red/yellow bell pepper (I added yellow because I enjoy it more)
          • 1 tsp. fresh chives, minced
          Combine the eggs, water, salt, pepper and creole seasoning in a bowl, whisking well.

          Combine the cheese, parsley and tarragon in a bowl and set aside.


          Heat oil in a skillet and add the zucchini and bell peppers; cook until tender. I also sprinkled a little creole seasoning over them as well as they cooked. Cook over low-medium heat and cover, stirring occasionally.

          Heat up another skillet and coat with cooking spray. Pour in the egg mixture and let it set slightly, do not stir. Carefully loosen the edges with a rubber tip spatula, tipping the pan to try to help the uncooked egg cook and settle.

          Sprinkle the cheese mixture over the omelet - my crumbles became a solid when I mixed with a spoon to blend the herbs, so I plopped several globs across the omelet surface.

          Using the spatula, flip one side of the omelet over on the other. (as you can see, I still have some runny egg)

          Now, using your spatula, cut the omelet in half so there are now 2 parts and flip over to let the other side cook.
           My omelets are not perfect, nor are the pretty, but they sure do taste good!

          After about 2 minutes, remove to a plate and sprinkle with chives. By this point, the veggies should be soft and lightly browned, ready to eat. Spoon out and serve with whole wheat toast!
          version 2 of picture from the top of page
          Related Posts Plugin for WordPress, Blogger...

          Print Friendly