Friday, September 9, 2011

Chicken Pesto Bake


This week begins Max Man's birthday celebrations! With his birthday on Saturday, I told him to pick out a few of his favorite meals for me to make this week. To my (fake)surprise, he once again requested chicken parmesan but with the recent tortellini gratinati, I had received my pasta fix. I decided to come up with something that I could enjoy while also providing him with one of his favorite dishes.

My friend Meredith and I were recently talking recipes and she sent me a post from a blog she follows. I looked at this recipe and could quickly relate it to a pesto chicken recipe that I have made from time to time. With this blog's influence, I decided to give it a try in conjunction with making Max Man's favorite. I adapted the recipe to my fancy and paired with spaghetti squash instead of pasta noodles.

Grocery List:
  • Spaghetti squash or pasta noodles of choice
  • 4 chicken halves
  • 6 oz. container of Pesto (for my homemade recipe, click here, this time I went for the freshly made version at Whole Foods to save on time)
  • 4 Cherry tomatoes, halved (up to your tastes, add more or less, or none at all)
  • Balsamic vinegar
  • Low fat, part skim mozzarella cheese, shredded
Click here for my Chicken Parm with red sauce recipe that I made simultaneously. Click here for my spaghetti squash technique.

To start, start heating you oven to 425 degrees. Spray a skillet or griddle with non-stick spray and we're going to quickly just pan sear those chicken breast halves to lock in the natural moisture so you have a juicy result after baking. Let it sear for about 1 minute on each side because the halves are much thinner and we do not want the chicken to cook through too much. 
 and flip

Take your pesto and spread about 1/4 cup along the bottom of the baking surface. As it heats, the olive oil from the pesto and the natural moisture release from the chicken. This will coat the meat in all sorts of great flavor and create more sauce on its own that you can later add to your spaghetti squash or pasta. 

Top the chicken with the pesto and add in some halved tomatoes to oven roast. Place in the oven and cook for 12 minutes.

At this time - if cooking the chicken parm with red sauce, flip the chicken breasts - add cheese to top the chicken and I added a drop of balsamic vinegar to each tomato. Of course a little bit drizzled in with the pesto but added a delicious tang to the end result! Place in the oven for another 8-10 minutes.

Remove from oven when cheeses are melted and bubbling.....

Using spaghetti squash or pasta, mix your preferred meal accomplice with a spoonful of the left over pesto and spoonful of the sauce from the casserole dish - a delicious blend! 

Top with the pesto chicken, followed by the roasted tomatoes and you have yourself a simple and delicious dish! Pair with a salad and serve. 
With a snap shot of Max Man's version too... funny, someone kept sneaking bites off my plate...

We had plenty for left over lunches the next day but I was almost out of pesto so I used some of his tomato sauce to toss my spaghetti squash in and that was a dynamic duo, I loved the tomato sauce contrast to the pesto chicken and highly recommend trying that in addition the double pesto!


Wednesday, September 7, 2011

Baked Tortellini Gratinati


With fancy dinner plans on Saturday night for the end of Restaurant Week, Max Man and I decided to take it easy and have a Friday night in. Going down the list of food genres, we decided to go with something of the Italian influence because we had a hankering for some pasta.

I've had baked tortellini on the list to try so after googling a few recipes I discovered that many dubbed this as a Gratinati. Rather than going to Wikipedia to define this, I'm pretty sure the context clues point to this as an Italian-type gratin. A gratin is typically topped with something (cheese!!) and baked - think potatoes au gratin. Meh?

I happened to have a cup of left over rotisserie shredded chicken from earlier in the week so I decided to add that in for protein. I also wanted to incorporate some kind of vegetable so after debating, we chose asparagus spears over broccoli, they take up less room than full florets meaning we could use more. Finally, the recipes I found all used an alfredo cheese sauce but seeing how alfredo contains 1) more cheese and 2) a lot of cream, we opted to get a tomato sauce in a can, fancy it to our tastes and stick with the cheeses for the topping to help cut back on the additional fats.

The end result was delicious and up for a repeat nomination.

Grocery List:
  • 1 package of tri-color cheese tortellini
  • 15 oz. can of tomato sauce
  • Basil, oregano, parsley to taste
  • 2 cloves garlic, minced
  • 1/2 cup roma tomatoes, diced
  • 1 cup shredded chicken (I recommend a nice rotisserie chicken)
  • 8-10 asparagus spears, chopped
  • 1/4 cup Half and Half
  • 1/4 cup ricotta cheese 
  • Pinch of Asiago cheese, shredded
  • 1/2 cup Parmegiano Reggiano, shredded
  • 1/2 cup Romano cheese, shredded
  • 1/2 cup low fat and part-skim Mozzarella, shredded
Start by heating your oven to 425 degrees. In a medium sauce pan, bring water to a boil, add tortellini and lower heat to medium. Cook for about 5 minutes until slightly larger. Drain almost immediately to prevent overcooking; the tortellini will continue to cook in the oven when topped with the sauce.   

In a skillet, add some olive oil and saute asparagus until bright green. Set aside to cool.

In a large mixing bowl, add your tortellini, diced tomatoes, chicken and asparagus.

Followed by ricotta cheese and a pinch of the shredded asiago cheese.

Stir it all together gently so that you don't break the tortellini.

In a sauce pan, heat the tomato sauce until just boiling and add the garlic, oregano and basil.Looking back, I would have roasted the garlic first, before adding it to the sauce, for a little more of the garlic flavor.

Now add the Half and Half to make a nice creamy tomato sauce.

Scoop about 2 wooden spoonfuls of your tortellini mix into an individual casserole bowl.

Top with your sauce, gently separating the contents with a spoon to help seep down into the pasta.

Top with your cheeses - I sprinkled some dried basil for a finishing touch.

Place in the oven for 20 minutes, or until cheese is lightly browned and bubbling.

Carefully remove and let cool for close to 5 minutes. Enjoy!

Tuesday, September 6, 2011

Banana Spice Muffins


We've talked about this before - when I say we've "talked", I mean that I have posted and you have read it, ergo, we've had a conversation - I am not a breakfast person. When I was little, my mom had to trick me the best she could eventually winning me over with Carnation Instant Breakfast shakes as I ran out the door to school. It could either be my inability to wake up more than 45 minutes before having to be somewhere, or the fact that I just do not have one iota of hunger in me until about 10 am at the earliest. This is something that I've been trying to change.

To assist in that effort, I've been looking for breakfast recipes to try out on weekends when there is ample time in the morning to make something, consume and go about my day, then save the oatmeal and cereal for breakfast when I get into the office.

I came across this muffin recipe in Cuisine Lite Fresh, Flavorful and Healthy magazine. We made them one Saturday morning for a fantastic result! They made 15 total allowing for left overs. Each muffin contains 206 calories, 7g fat, 46mg chol, 32g carb, 5g protein and 54mg calcium.

Grocery List:
For streusel topping
  • 1/4 cup chopped walnuts (I simply threw walnuts into my mini-food processor)
  • 2 tbsp. all-purpose flour
  • 2 tbsp. brown sugar
  • 1 tbsp. unsalted butter, melted
  • 1/2 tsp. ground cinnamon
For muffin mix
    • 2 cups all-purpose flour
    • 1/2 cup granulated sugar
    • 2 tsp. gound cinnamon
    • 1 tsp. baking powder
    • 1/2 tsp. baking soda
    • 1/2 tsp. ground cardamom
    • 1/4 tsp. nutmeg
    • 1/4 tsp. kosher salt
    • 1 cup low-fat vanilla yogurt
    • 1/2 cup mashed banana
    • 2 egg yolks (reserve whites)
    • 3 tbsp. unsalted butter, melted
    • 2 egg whites
    Start by preheating your oven to 400 degrees. Line muffin tins with paper liners and coat with non-stick spray. We are going to start by making the streusel topping combining the walnuts, 2 tbsp. flour, the brown sugar, 1 tbsp. melted butter and 1/2 tsp. cinnamon. Stir together well and set aside.


    In a large mixing bowl, combine 2 cups flour, sugar, 2 tsp. cinnamon, baking powder, baking soda, cardamom, nutmeg and salt.

    You will need both egg whites and egg yolks for this recipe, both at different times of the process. The way we separate eggs around here is literally, hands-on. Here's Max Man using his fingers to drain the egg whites while catching the yolk. Gently run the egg contents back and forth between fingers/hands to get the egg white out and end up with just the yolk.

    In a smaller bowl, whisk together the yogurt, smashed banana, egg yolks and 3 tbsp. melted butter. Stir this into the dry ingredients.


    Finally, in another separate bowl, whip together the egg whites until they "peak". One thing I've learned is that you want your egg whites at room temperature for the best result. So for this recipe (and any other time you use egg whites), set your eggs out a little before you begin your process so they are closer to room-temp, rather than just out of the fridge. I'm pretty sure we still didn't get this part 100% correct, but we whipped as we could until they looked like foam - the best way to do this is with electric beaters. You will want to gently fold the egg whites into the batter. And I apologize, we did not capture this by accident - probably the most helpful picture for you.....but here is the outcome of the muffin mix.


    When your egg whites are well combined, your muffin mix is ready to dole out into the muffin cups, filling about 2/3 of the cup with batter. Gently add a dollop of streusel to the top of the muffin - I used my fingers and fork to gently spread across the top of each muffin. You don't need too much, the spreading goes a long way.

    Bake the muffins for 15-20 minutes and to help your certainty, advance the toothpick test - if clean, you can remove from the oven!

    Let cool for about 5 minutes and indulge.
    Served with scrambled eggs and fruit

      Thursday, September 1, 2011

      Recipes: Fall Favorites

      On the first day of September my blog-reel gave to meeeeee... Some delicious and easy fall recipeeees!

      You know you sung it while you read it. I cannot believe it is the first day of September. I know, we all say this, but this year has really gone by so fast. Even though it is still so warm, September always signifies the start of fall for me. As we gear up for changing seasons, tastes begin to vary into richer flavors with different kinds of spices, fruits and vegetables. I wanted to give you a week's worth of some of my favorite fall recipes for you to try in the coming month. I'm entering into event season part two, so expect more 30-minute meals, and crock pot classics during the month of September. Enjoy!


      Wednesday, August 31, 2011

      Hatch Chile Stew


      It is not a secret that Whole Foods is my favorite grocery store.The reason for this because of their fresh, wonderful selections and let's be honest, the proximity to my current residence. However, my world will be rocked in a month when I get to go through a move across town and I head back to my old 'hood from four years ago. At that time, Central Market will be my closest store and I will not hesitate to say, probably my new preference. Contrary to what some of my recipe posts may convey, I do like easy, people. Additionally, Central Market does have a one-up on Whole Foods because they offer cooking classes with some impressive product mention that is rather enticing AND they are advocates of the "sample while you shop" method. I am a fan of this, which leads into how we came across this gem of a meal.

      To help acclimate myself again to my former and soon-to-be new stomping grounds, okay and maybe for the 4th course coupon for Dallas' Restaurant Week with purchase of $25, I decided to do my Sunday grocery shopping there a few weeks back. As I meandered through the maze that is the store, I sampled all kinds of treats. In the meat section, they had a Hatch Chile Stew with pulled pork at the demonstration station. I had two plastic cup helpings (you know, sometimes you taste the mini-spoon amount and think, I need to try it again, just to make sure that I loved that as much as I think I do). I then gave some to Mr. Max for his approval and the next thing I know, he had the jar and was adding it to the cart. Meet the star of this post.

      For those looking for a nice and simple dinner, this is your winner

      Yum. Thank you Will, Brian and Kyle.

      Grocery List:
      • 3/4 jar of jarred Green Chile Stew
      • 1 lb. lean ground pork or turkey
      • 3 medium sized Yukon gold potatoes
      • 1/2 cup white corn

      Preparing the potatoes is the most time consuming part and that is not saying much. Start by peeling and then chopping the potatoes down to small chunks. Now class, why do we prefer the smooth, white Yukon potatoes to rough, brown Russet potatoes?? Because they contain less starch! Once chopped, boil in a pot until they can be easily pierced by a fork, but do not over cook, you do not want mushy taters.

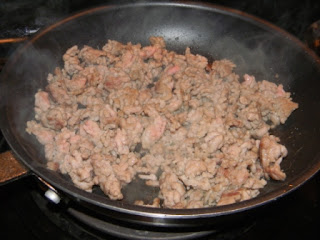
      Next, add a dash of olive oil to the skillet to brown and cook your meat for about 10 minutes on medium-high heat.


      Unpaid product placement: I highly recommend investing in this pasta scoop by Giada DiLaurentiis. It was apart of a cooking utensil birthday package that my brothers gave me. This really comes in handy! Once potatoes are ready, scoop and strain..........

       .........into a crock pot with the meat.

      Add the jarred green chile mix and the corn into the crock pot on a high heat setting, stir together. 

      To serve, spoon your stew into bowls, garnish with a nice shredded Monterrey Jack cheese and cilantro!

      Monday, August 29, 2011

      Remix: Hatch Chile and Chicken Enchiladas


      Tis the season for hatch chile peppers! Last summer to observe this, we went to Amy's lake house and made these tasty enchiladas, replacing the poblano in the original recipe with the hatch peppers along with a few other adaptations. Now here we are again, one year later, putting our hands together to recreate this delicious dish. We had Meredith on the Guacamole, Amy on the Black Bean and Corn Salsa, and Greer chopping everything possible as she sat still due to a recent knee injury. In the back ground we had ABC's Bachelor Pad and Bravo's Most Eligible: Dallas to fulfill our quota of laughable, ridiculous, mind-numbing reality TV "entertainment" for the evening. We re-vamped the original recipe just a bit and will re-post some highlights for you here.

      Grab a glass, pour some SkinnyGirl Margarita or Sangria and let's get started!! For the full recipe, click here, this post is just a recap. 
       Mixing the chicken and the spices

       Beginning phases of the sour cream and hatch chile sauce

       Greer chopping but taking a quick guacamole break

       Adding 1 cup of the sauce to chicken mix (original recipe said 3/4, we went big tonight)

       Enchiladas, rolled and ready: Snug as a bug in a rug.

       Topped with hatch chile sauce...

       And now the cheese...

      Sprinkled with cilantro and scallions, baked until golden and bubbly!
      Related Posts Plugin for WordPress, Blogger...

      Print Friendly